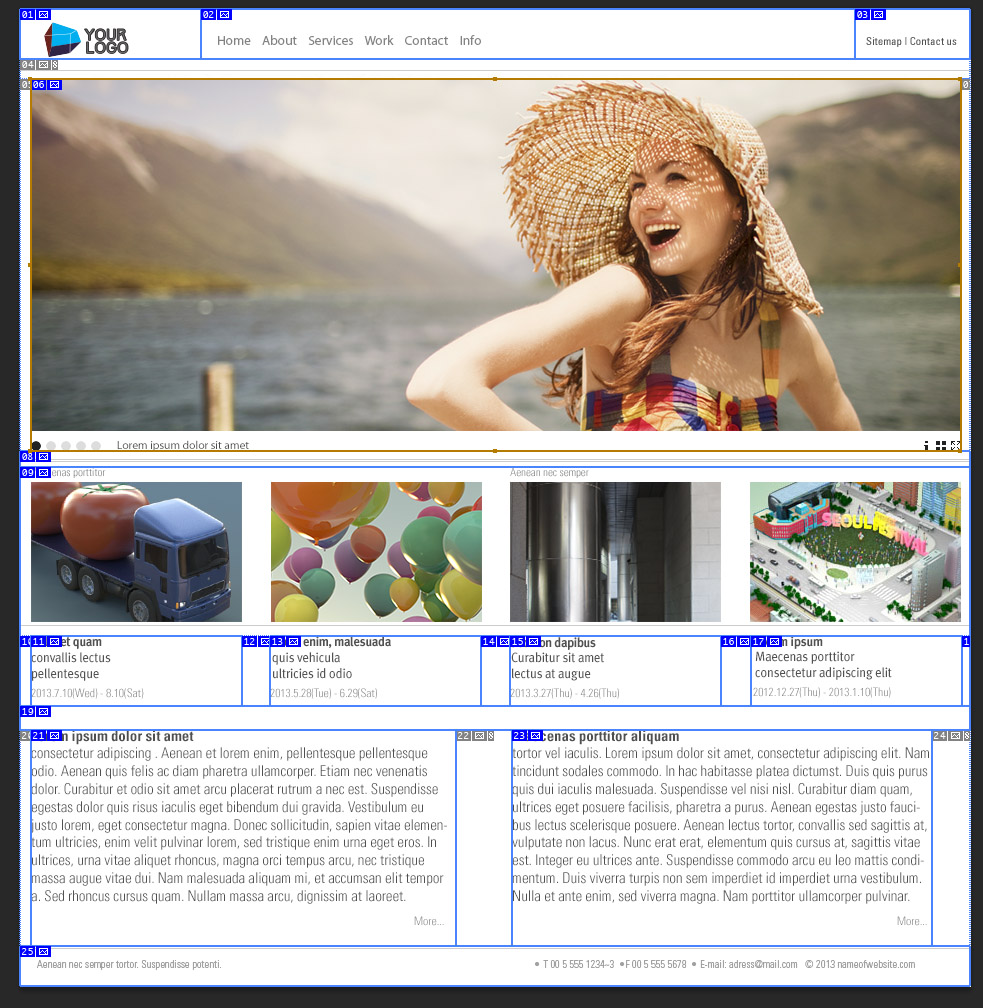
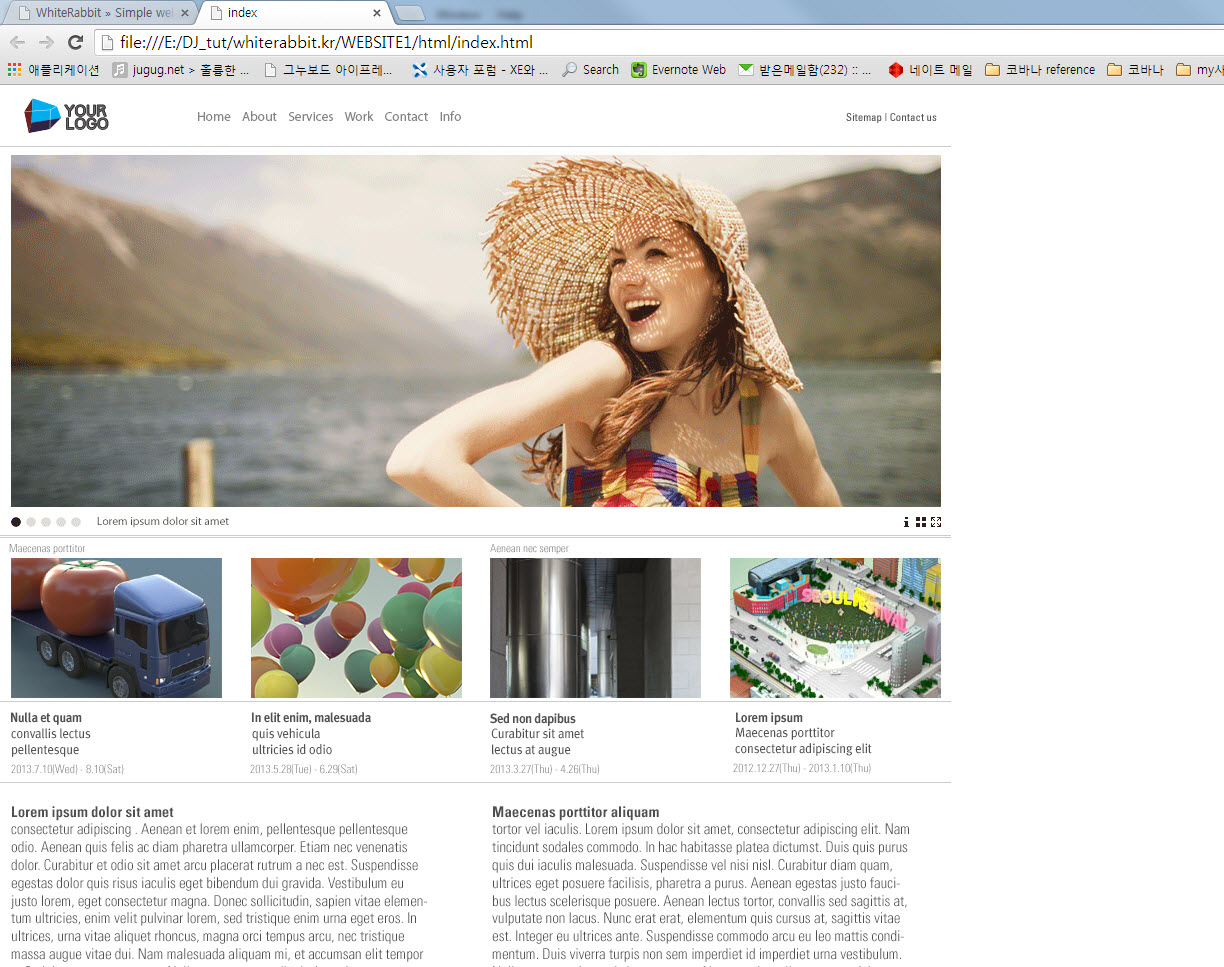
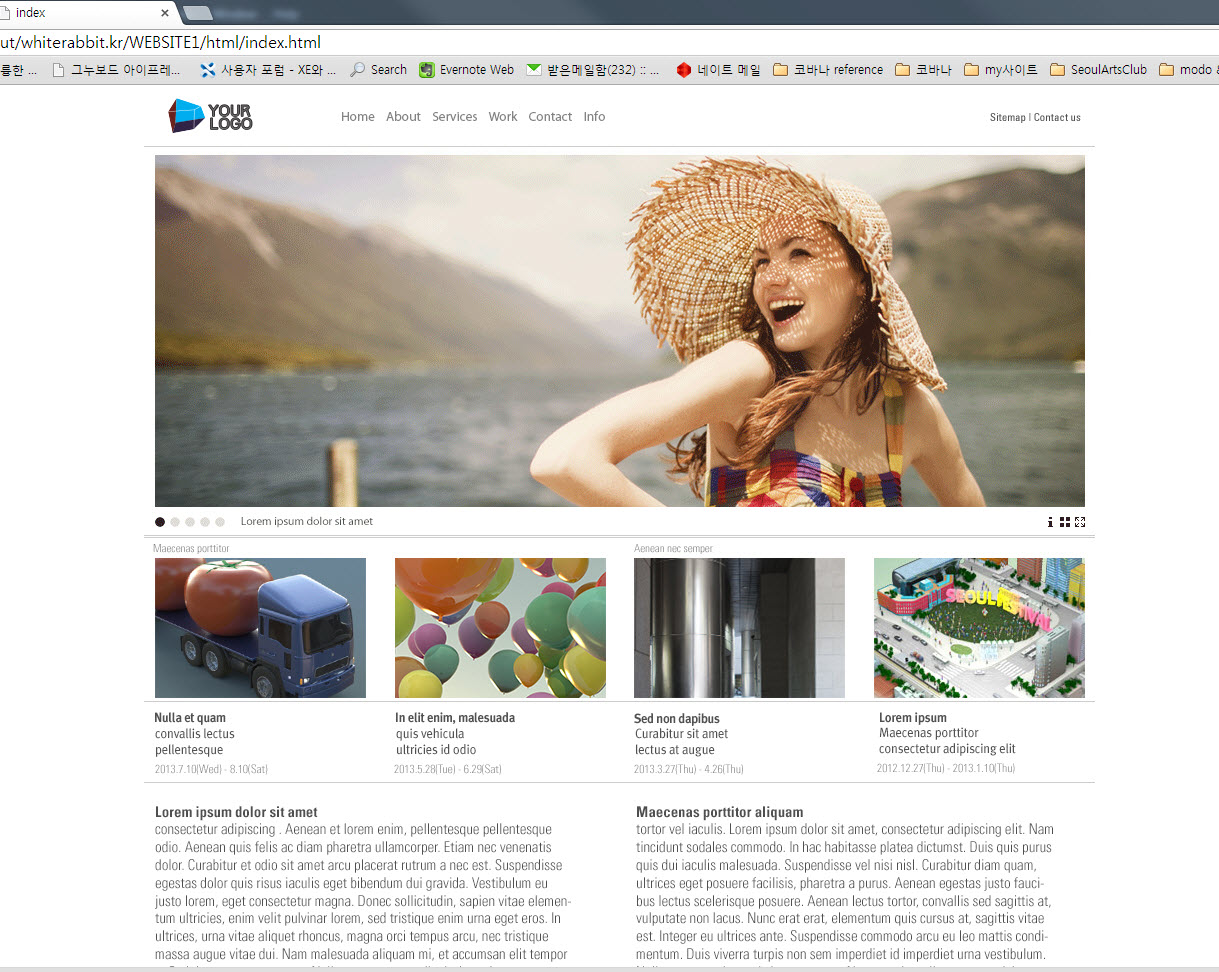
This is final look. I made it with photoshop. Main image that I bought in istock. (메인 페이지 만들기. 웹 표준에 맞는 나은 방법이 있으나, 저는 이 방법으로 html, css 코딩을 최소화하여 쉽게 만들었습니다. 물론 사이트 규모가 커지거나 한다면 체계적으로 만드는게 좋겠지요. 이 방법은 목업이나 시작점으로 활용하는게 좋을 것입니다. 프리뷰 링크 1. structure preview Adobe CC dose not support spry anymore, but I gonna use it anyway. But this looks good. CSS Menu Maker. 2. Design your main page. I made 951 x 978 document size. 3. With ‘Slice Tool’ slice the elements. 4. I sliced like this. 5. File / Save for Web. With this settings. It will make table structure. 6. Or you can use this setting to avoid table. 7. If you preview the index.html, the all contents are align left. 8. To align center, open index.html file in Dreamweaver. (or other text editor) 9. Add this code in front of <div class=”Table_01″> 10. Add this close code right after last </div> 11. Add this code in css. 951px is document’s width. 12. You can see the contents align center. 13. You can download the last html file at part3
There are right way to do this. I mean you should make a webpage using html for structure and editing css for the look. Only if you know the web standard.
But this is just how I made a simple website less html and css coding as possible.
You can use this way as a mockup or starting point.
Preview link.
아래는 최종 모습. 포토샵에서 제작
메인 이미지는 아이스톡에서 구입)
I gonna use ‘spry’ for menu, and ‘Galleria’ for main slider.
If there are better and easy alternative, let me know plz.
Or Son of Suckerfish.
(구조 미리 보기. 메뉴에는 spry 사용, 메인 슬라이더에는 Galleria 사용
어도비 CC에서 더 이상 spry를 지원하지 않지만 어쨌거나 이전에 사용했던 방법을 정리.
더 나은 대안이 있다면, 물론 있지만 제말은 더 쉬운 대안이 있다면 알려주시길 바랍니다.
하지만 이것은 괜찮아 보이네요.
혹은 이것도 Son of Suckerfish.)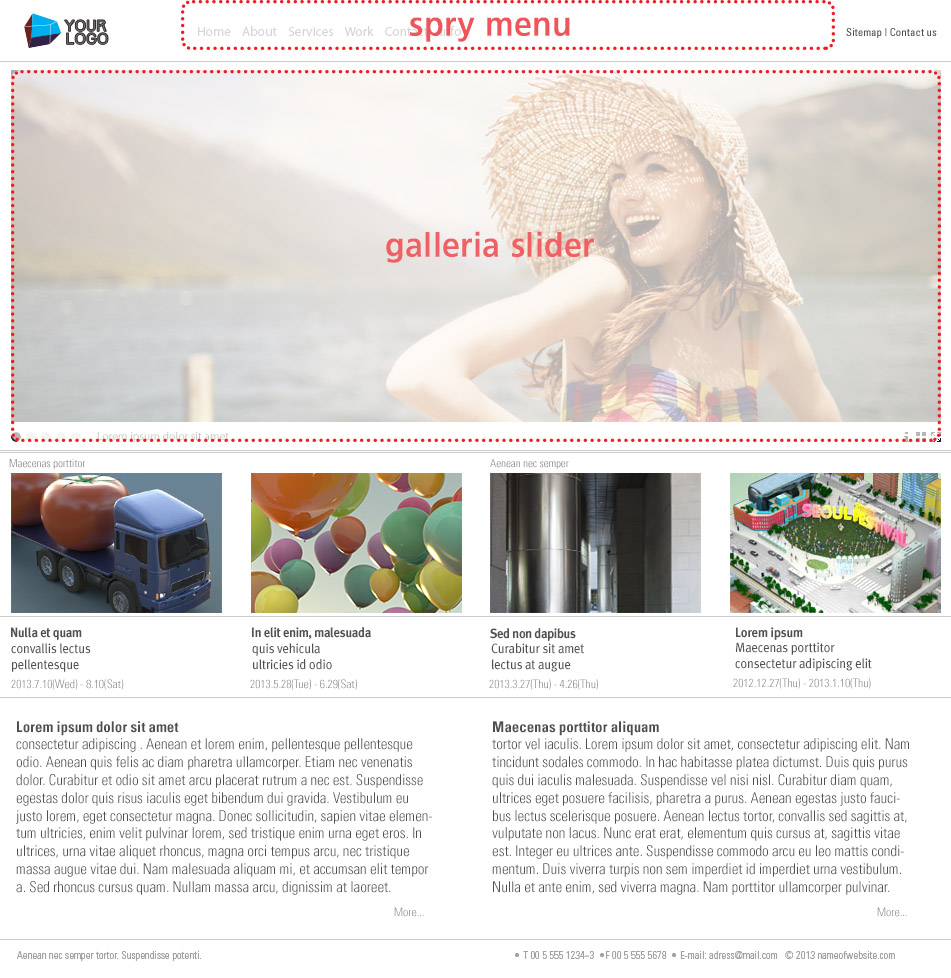
(메인 페이지를 디자인. 951 x 978의 도큐멘트 사이즈 사용)
(슬라이스 툴로 요소들을 나눈다)
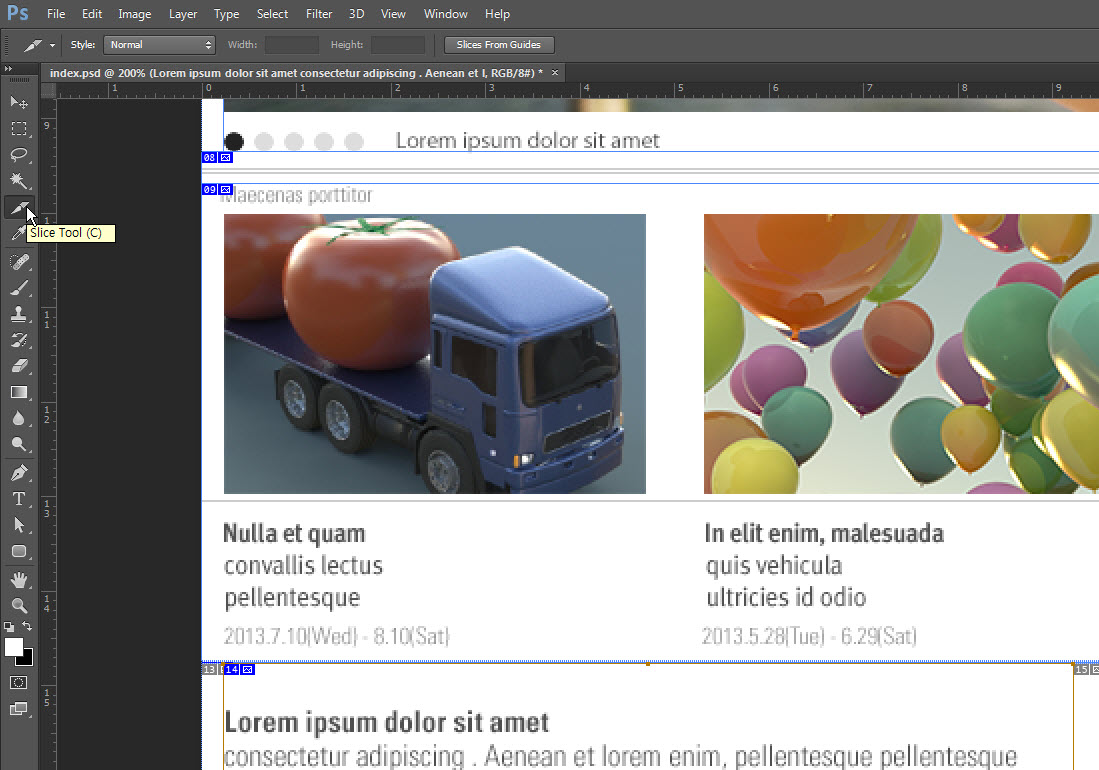
(저의 경우 이렇게 나눔. 사실 대충 나눴다)
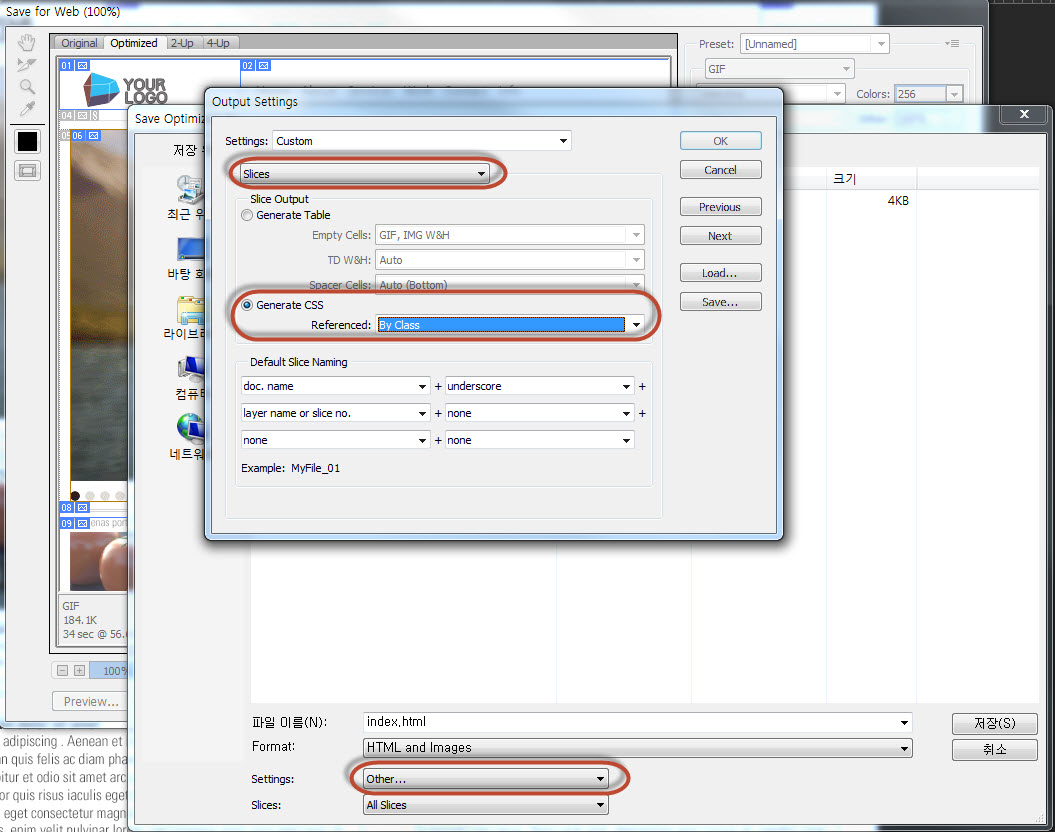
(File / Save for Web에서 아래 세팅으로 저장. 이 세팅은 테이블로 만들어 준다)
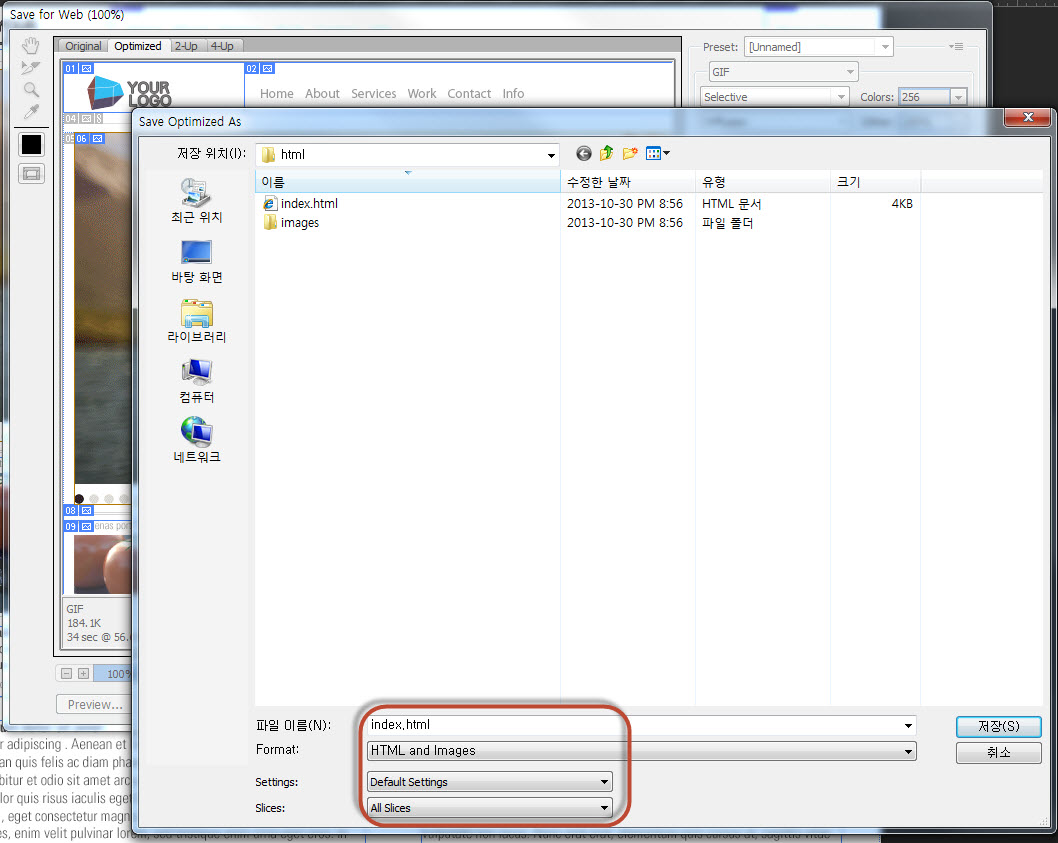
first – Setting : Other… and like this picture below. It will make div and css.
I use this way, not table.
(혹은 아래처럼 하는데 우선 Setting : Other…를 선택한 후 나머지를 그림 처럼 선택. div와 css로 저장됨. 여기서는 이 방법을 사용. 5번 처럼 테이블로 안함.)
(index.html 파일을 브라우저에서 열어보면 모두 죄측 정렬되어 있다)
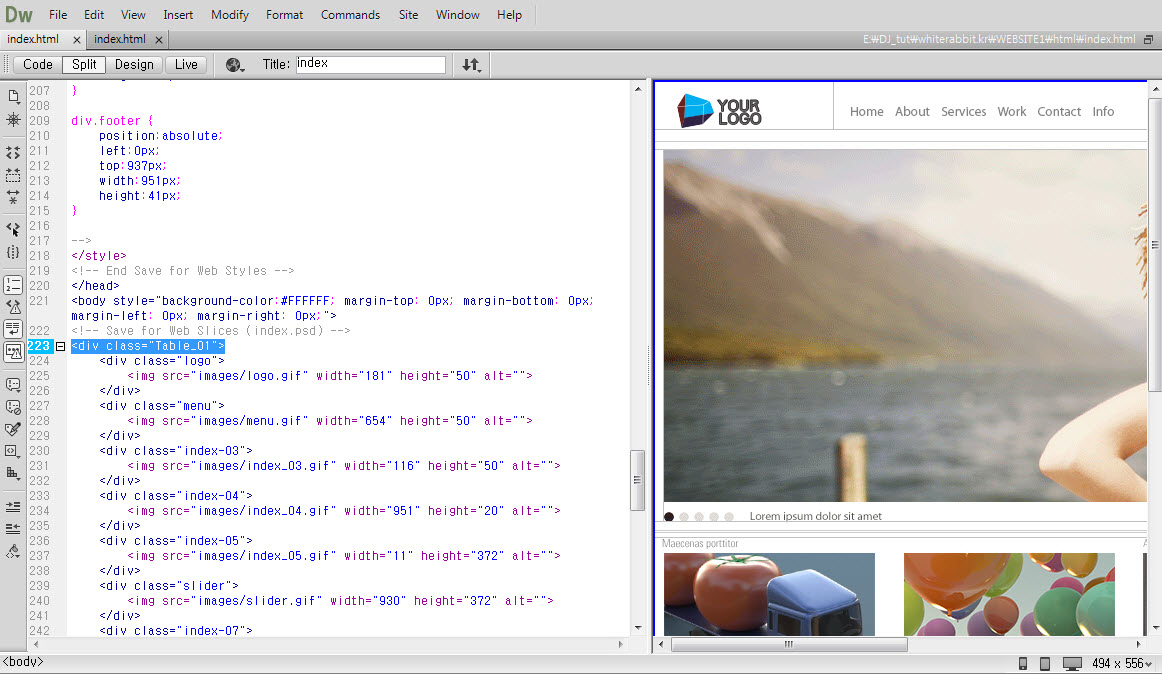
As you can see, <div class=”Table_01″> contains all the contents. ‘Table_01’ text can be different text.
(중앙으로 정렬하기 위해, index.html 파일을 드림위버에서 연다. 혹은 다른 에디터에서.
보는 바와 같이 <div class=”Table_01″>가 모든 내용을 감싸고 있다. Table_01라는 텍스트는 다를 수 있다)
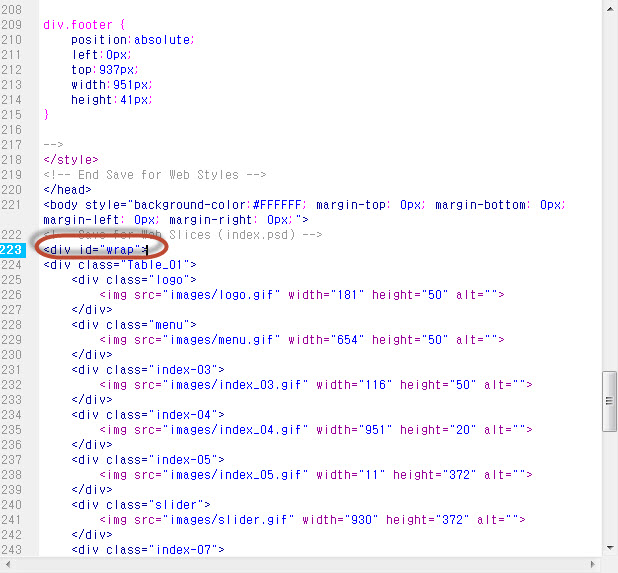
(아래 코드를 <div class=”Table_01″>의 앞에 넣는다)1
<div id="wrap">
(아래 코드를 </div> 다음에 넣는다.1
</div> <!-- close "wrap" -->

(아래 코드를 css 부분에 넣는다. 951px는 도큐멘트 폭이다)1
2
3
4
5
#wrap{
  margin:0 auto;
  width:951px;
  position: relative;
}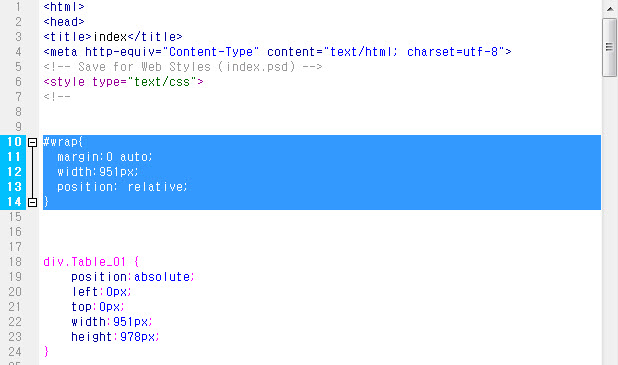
(이제 중앙 정렬되었다)
(최종 세팅된 html 파일은 part3 내용 하단에서 링크 걸어 놓았다)
Making simple website with Photoshop and Dreamweaver [part1] 간단한 웹사이트 만들기
[Part 1] is about making main home page.
Leave A Comment